Local Control of the Daikin Altherma 3 Heat Pump
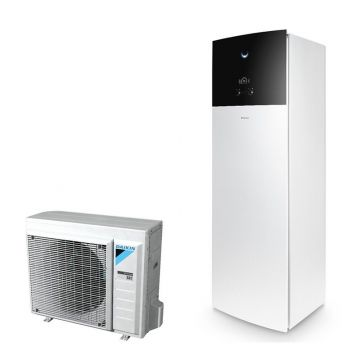
Since February 2023, our house has been heated by a Daikin Altherma 3 heat pump and we’re off natural gas. This is a split-unit system that handles both home heating and domestic hot water. It consists of an outdoor unit, similar to what a normal air conditioning installation has, and an indoor unit containing piping, a heat exchanger, and a hot water tank.
After installation, I first monitored it using ESPAltherma. This allowed me to optimize its operation. To control it via Home Assistant, I used Johnny Willemsen’s Onecta integration, but this only works through the cloud.
Over time, I discovered behaviors of the heat pump that I wanted to improve. Additionally, according to the documentation, there was a possibility to buffer energy in the hot water tank or underfloor heating, which I found interesting.
This began my quest for local control of the heat pump.
Goals
- Control the unit completely locally and integrate it into my home automation. Think of automatically adjusting temperatures when on vacation, or buffering energy in the hot water tank. Also, everything would be in one user interface, instead of having a separate app for each “smart” device.
- Allow for custom thermostat logic to solve some shortcomings of the unit. See Building an ESPHome Modbus Thermostat.
- Enable energy buffering in the hot water tank or underfloor heating to better utilize my solar panel production and reduce grid load.
Requirements
Local communication using open protocols where possible. It must be an officially supported solution by Daikin. No reverse engineering or (unsupported) modifications to the heat pump, as this is a critical system in our house with 2 small children :P.
Interfaces
Daikin’s Cloud: The Wireless Gateway
This is an SD card-like module that’s inserted into the indoor unit.
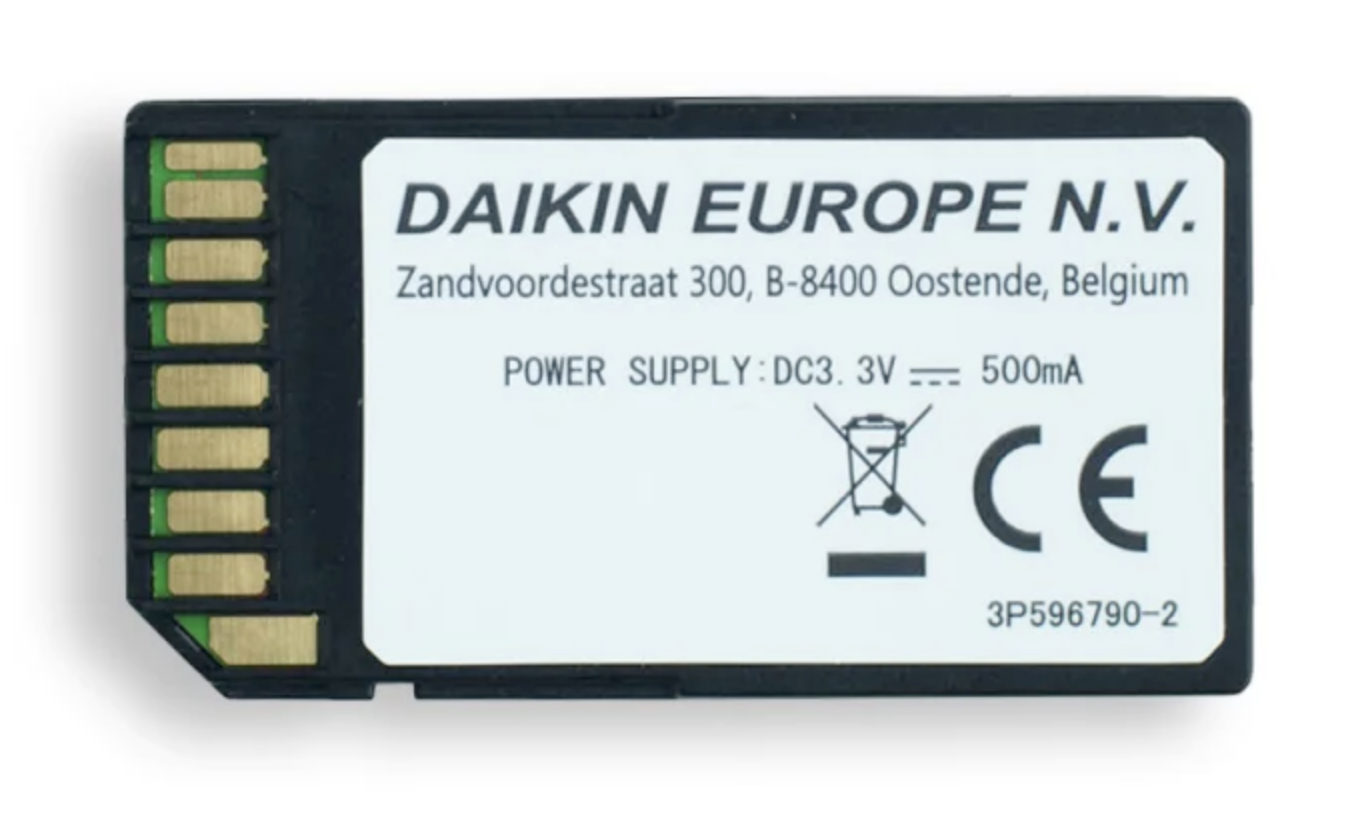 It connects via WiFi to Daikin’s cloud. This is the modern variant of 2 older solutions which all ultimately connect to Daikin’s cloud.
Besides not wanting cloud communication for my home automation, Daikin’s support for this is very limited. The app can only adjust temperature in half-degree increments. The schedule is even less accurate, where you can only set temperatures in 1-degree increments.
You can also tell they’re not keen on supporting external systems through this route. Initially, there was a Home Assistant integration that used the same API, but this was quickly replaced by Daikin with the ONECTA Cloud API intended for external integrations like Home Assistant. However, this was limited to a certain number of calls per day and didn’t allow me to control the unit as desired.
So until I found an alternative, this was how I integrated it with my home automation. Meh.
The Smart-grid contacts
These are contacts you can close or open potential-free, for example with a relay. ESPAltherma uses this (see below) among others, or you can tinker with ESPHome for example.
| Contact 1 | Contact 2 | Operation Mode |
|---|---|---|
| 0 | 0 | Free Running |
| 0 | 1 | Forced Off |
| 1 | 0 | Recommended on |
| 1 | 1 | Forced on |
The documentation on it’s behavior is good, but the possibilities are very limited. This Smart-grid interface can be extended with 2 IO-boards from Daikin, which allow you to set power limits for example, but these are very expensive for the capabilities provided, and still can’t do what I need, like setting the tank temperature.
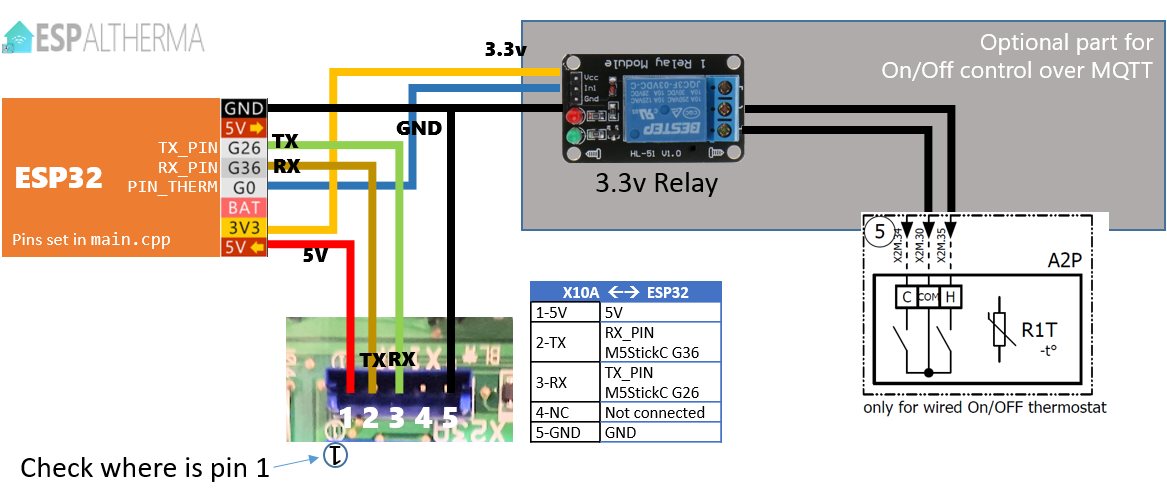
The X10A serial port
The X10A port is an internal port on the indoor unit. I’d rather not use this port because it allows sending undocumented internal commands to the heat pump. This port is also used by Daikin engineers to update the indoor unit’s firmware (not to be confused with the user interface software on the indoor unit). It’s an active protocol where you send a query for information and receive a response from the indoor unit.
Practically the only open source project using this is ESPAltherma. Since it only sends queries to request data, and doesn’t modify settings or send commands, it seems somewhat safe. It’s also being used by many people already.
It provides a wealth of information. With that information, you can perfectly optimize your heat pump.
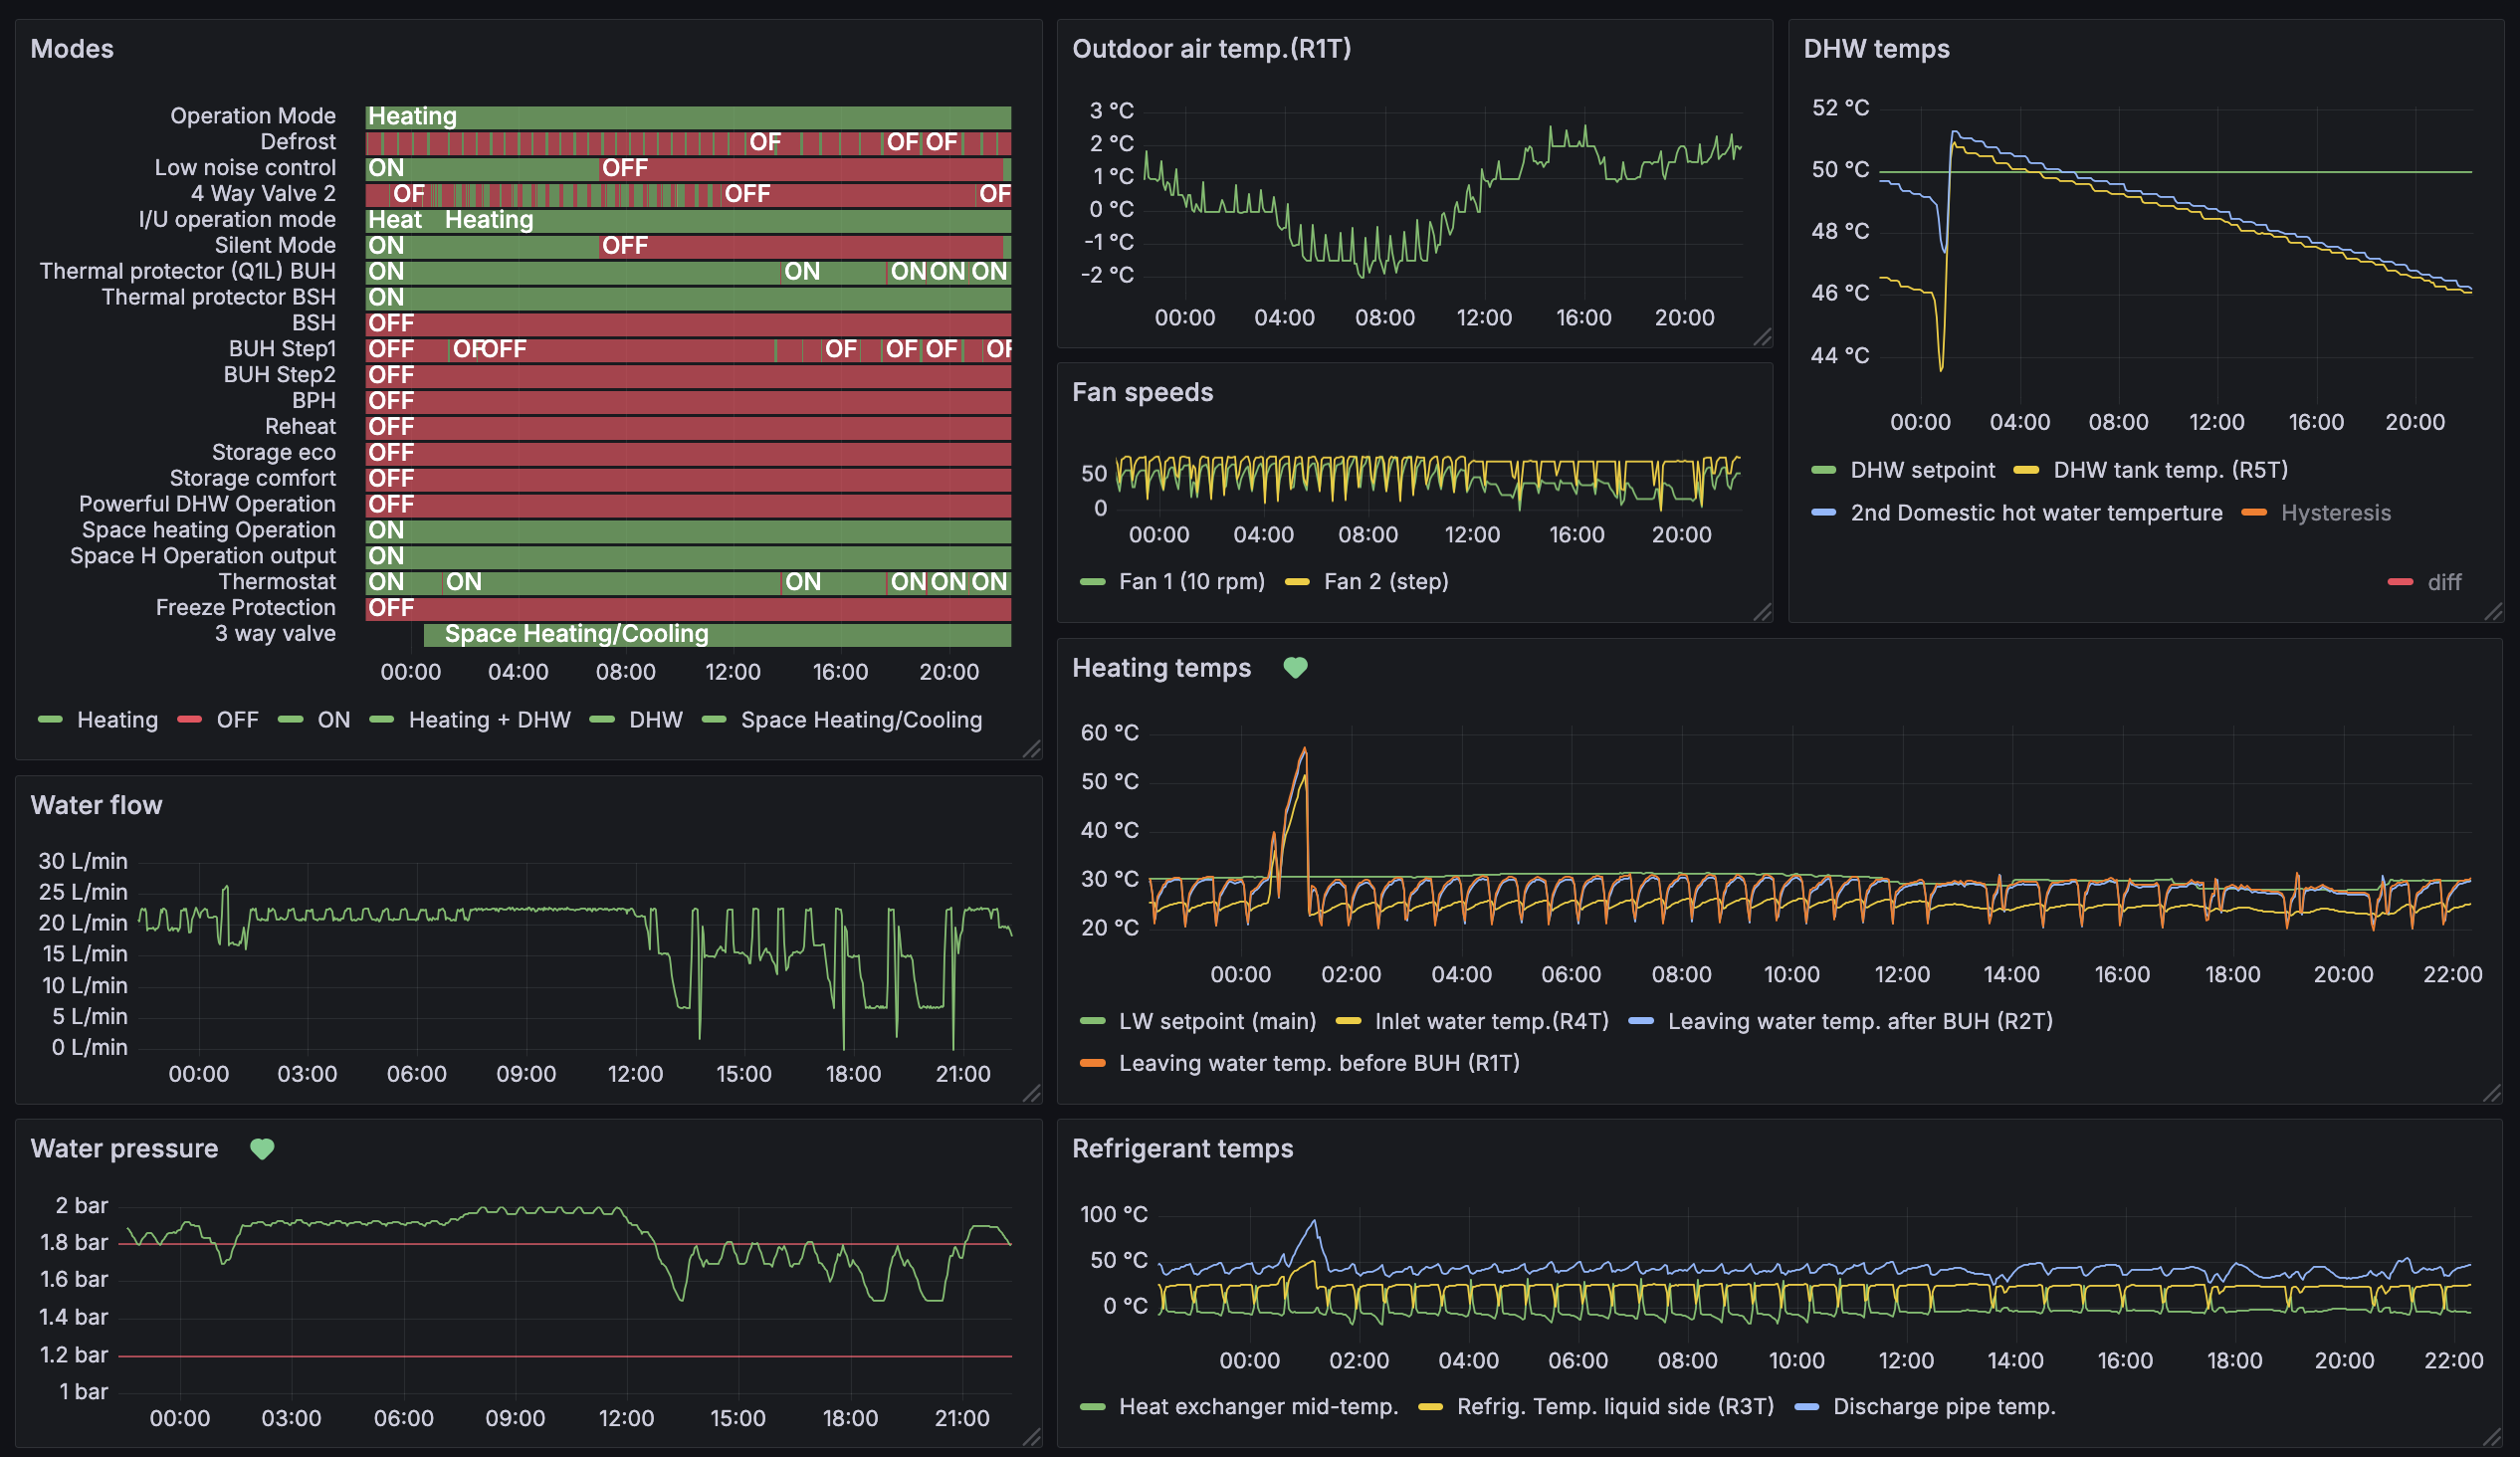
However, changing settings always happens manually on the unit itself, as controlling the heat pump is limited to controlling the smart-grid contacts of the indoor unit with a relay. Changing the living room thermostat setpoint, for example, isn’t possible.
The P1P2 bus via Open Source
The P1P2 bus is Daikin’s proprietary bus that they’ve been using for several generations of their devices to communicate between different devices. For heat pumps, this is used between the thermostat and indoor unit (nope, no OpenTherm). This is a 2-wire bus, which you can freely daisy-chain between different devices.
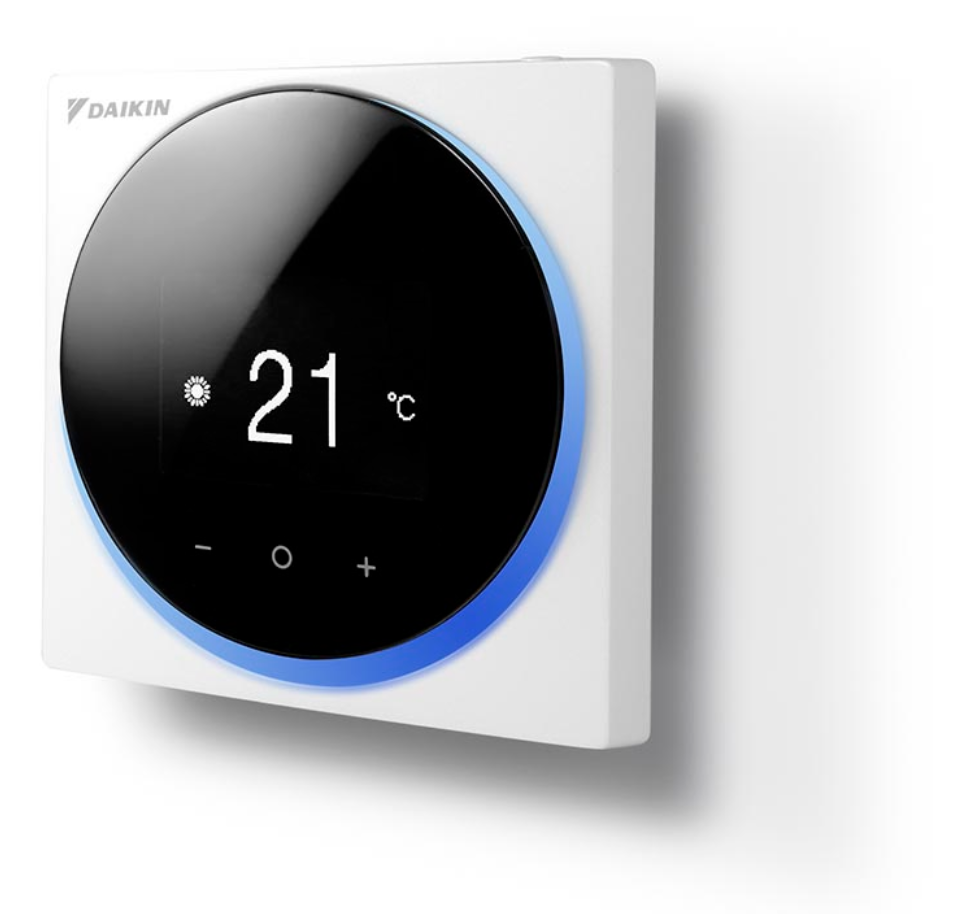 In my case, there was a Madoka thermostat as the only device connected to it, which Daikin also calls the “Human Comfort Interface” :P.
There exists an open source project that has reverse-engineered this protocol. Formerly P1P2Serial and now P1P2MQTT. However, since there’s no official public documentation from Daikin for P1P2, I didn’t dare to control the heat pump with it. If I can find a more Daikin-supported way, that would be my preference.
The P1P2 bus and third parties
Daikin does work with third parties to develop products that use the P1P2 bus. So there is documentation of this bus that third parties use to develop products. As such, there are quite a few products available for KNX that can control Daikin products via P1P2. So far, I haven’t really looked into this for 2 reasons: KNX is not an open protocol. You pay license fees for software to program this, and most products have limited support for Daikin Altherma 3.
The P1P2 bus and Daikin’s Modbus products
Daikin has several Modbus to P1P2 products on the market. The following 3 support the Altherma 3: DCOM-LT/MB, DCOM-LT/IO, and the Daikin Home Hub (EKRHH). The first supports only modbus, and the second both modbus and analog inputs.

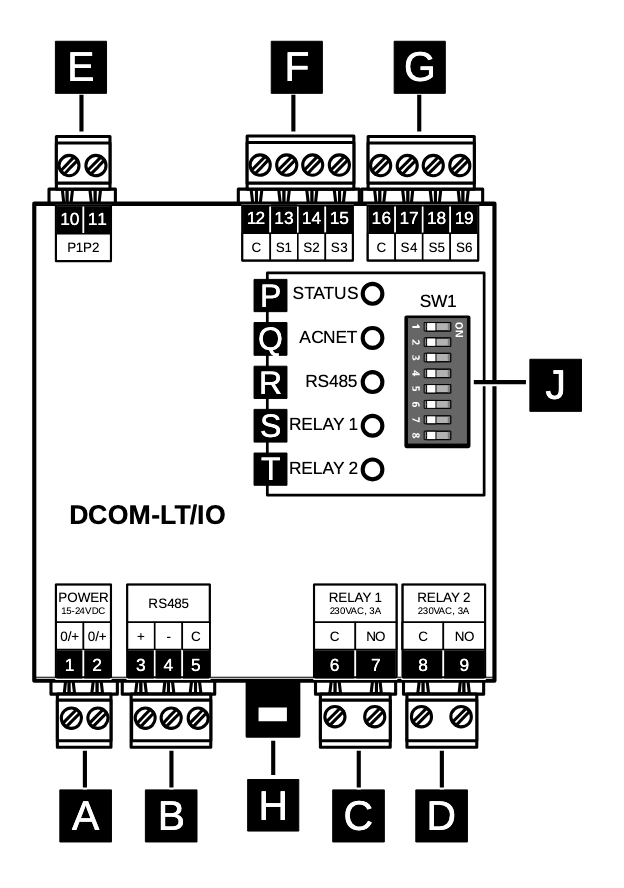
The DCOM-LT/IO has the capabilities I’m looking for. The control would still be somewhat awkward, as some features are only available as analog inputs. This still required quite a few connections between an ESP32 and this module, but I’m getting close to what I’m looking for.
Until Daikin introduced the Daikin Home Hub (EKRHH)!
The P1P2 bus and the Daikin Home Hub
Introduced late 2023, the Daikin Home hub is meant for optimizing self-consumption/production. It’s mounted in the electrical cabinet and is connected to the heat pump’s P1P2 bus. Via a USB port a P1 cable can be connected to a smart meter, and that’s all you need to use buffering in your underfloor heating or the hot water tank. Wow. Compared to what I’m used to from Daikin so far with IO boards for example, this is a futuristic product!

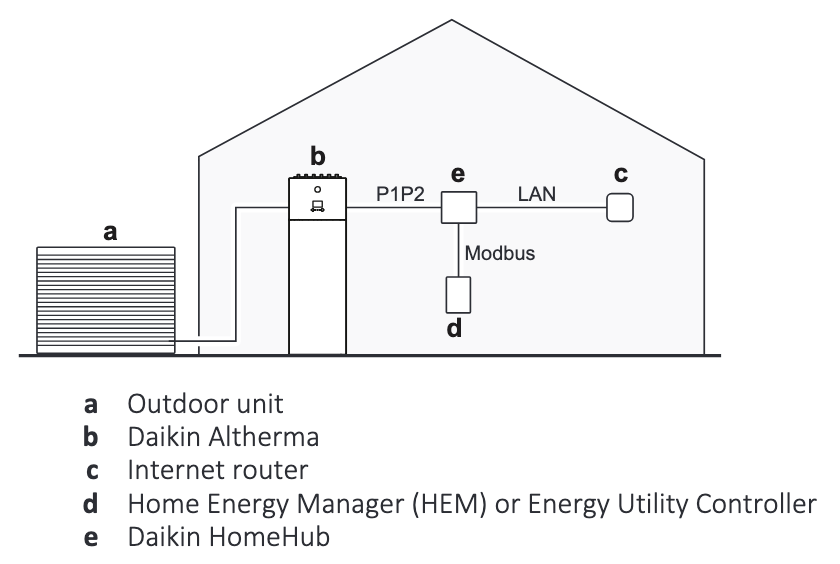
It also supported a Modbus mode, where all intelligence is disabled and you are able to take control over the unit. You can even choose between Modbus RTU (serial) or Modbus TCP accessible over the ethernet port. From what I can tell from the documentation, this provides all the capabilities I’m looking for with the Altherma 3.
Purchasing the Daikin Home Hub
Purchasing the Daikin Home Hub was a bit of an issue, as paying over 600 euros for a router-sized box that does nothing more than bridge between P1P2 bus and Modbus seemed quite expensive. After monitoring prices on German websites for a while, I found one for just over 300 euros. Then I decided to buy it.
Check your unit’s firmware version
After purchasing and installing the Daikin Home Hub, it turned out that the indoor unit still needed a software update to communicate with the Daikin Home Hub. This concerned the firmware on the main board of the indoor unit, the so-called “Micon ID indoor”. Not the MMU (the user interface you see on the indoor unit, this auto-updates with the app).
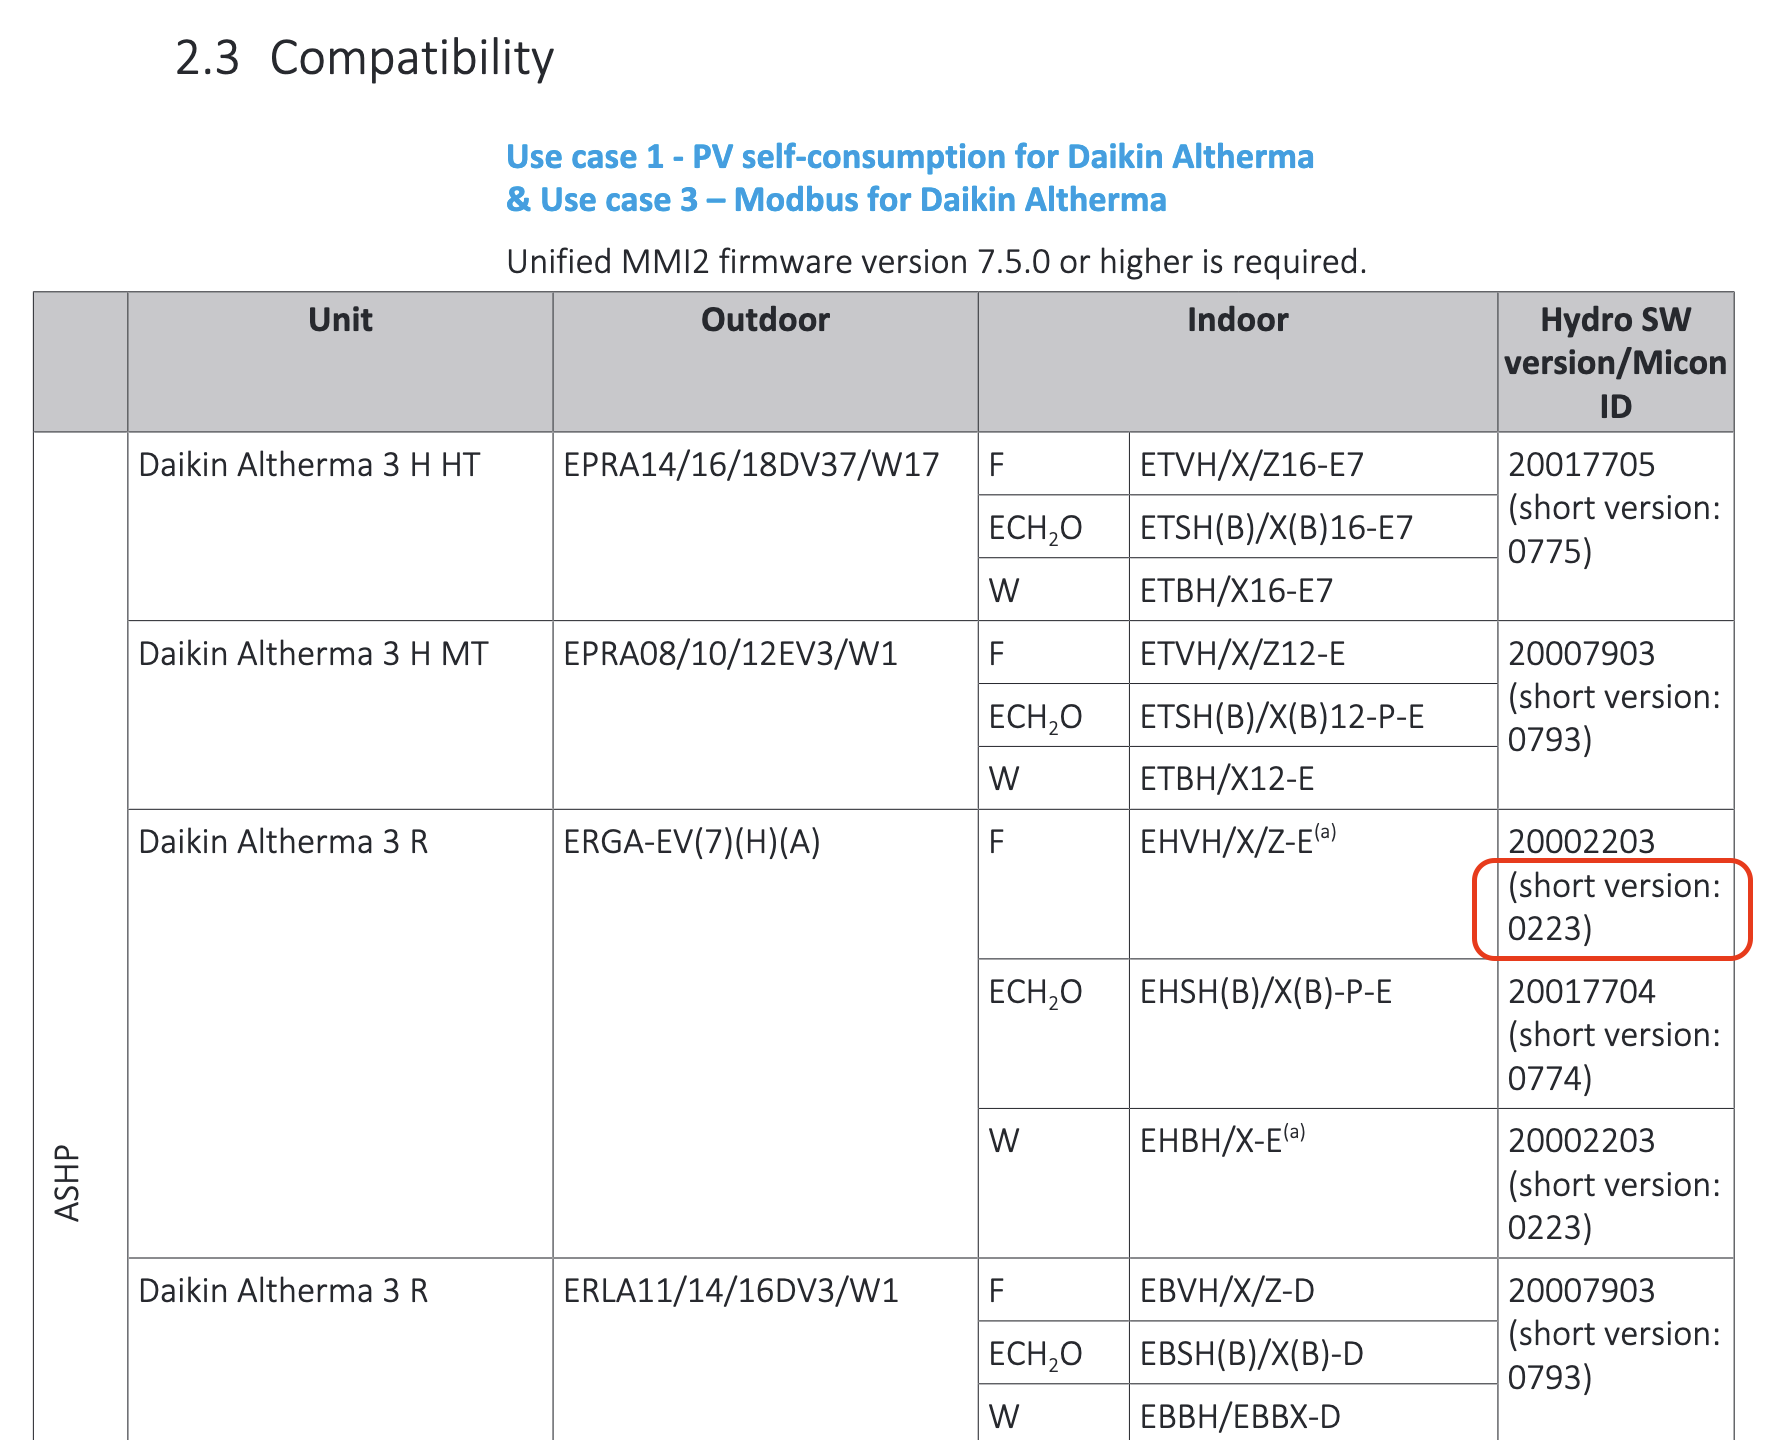
From Daikin’s extensive installer manual, the required Micon ID version for the indoor unit to communicate with the Daikin Home Hub. I had version 0222, which doesn’t meet the requirement.
This was a long process with Daikin and was far from smooth. After months of back and forth, a service request for a Daikin engineer was finally created, who could perform the firmware update for me at my home. After which the Daikin Home Hub worked as expected. Daikin did this for free for me, mainly due to the lack of clarity of this process on their side. Expect to pay well over 300 euros for this normally.
Next steps
After reviewing options for local control, the Daikin Home Hub seems the best choice. Supplemented with ESPAltherma for reading data that the Home Hub can’t provide.
I now finally have control over my heat pump in an officially supported way, completely locally, via an open protocol and can now build my own thermostat! See Building an ESPHome Modbus Thermostat where I go into detail about how I built my own thermostat with ESPHome and eventually replaced Daikin’s and got much better results.
Leave a comment